Showing posts with label technique. Show all posts

Tuesday, December 3, 2013

Wild Angel with Filigree and a Doily

Here is how to make a
wild angel from a doily and one of these flower filigree borders


Christmas Angel Cards

 Use strong scissors or tin snips to cut off the wings and 2 of the petals from the flower like this.

Christmas Angel Cards

Take a 11cm doily and fold it in half ...

Christmas Angel Cards

and then fold it into thirds like this.

Christmas Angel Cards


 Draw a line along the edges with Glossy Accents and pour some Glass Glitter over it. You can find several colours of Glass Glitter in the glitter and microbeads section.

Christmas Angel Cards

Now glue the wings, the flower petals ("hands") and a circle pendant on the folded doily like this.


 Make some wild hair by winding some wool strands around 3 fingers 4 times (or more, depending on the wool). Tie the middle with some thread and cut open the sides. 


 Glue it on the head, draw on a face with permanent marker - if you want - and your wild angel is done.

Christmas Angel Cards

 You can use her on a card, or as a tree decoration (tie a ribbon through the loop on the circle pendant). 

Christmas Angel Cards

Here I have made a card using a piece of kraft card, a bit of lace and some gold baker's twine


GELI

Saturday, March 30, 2013

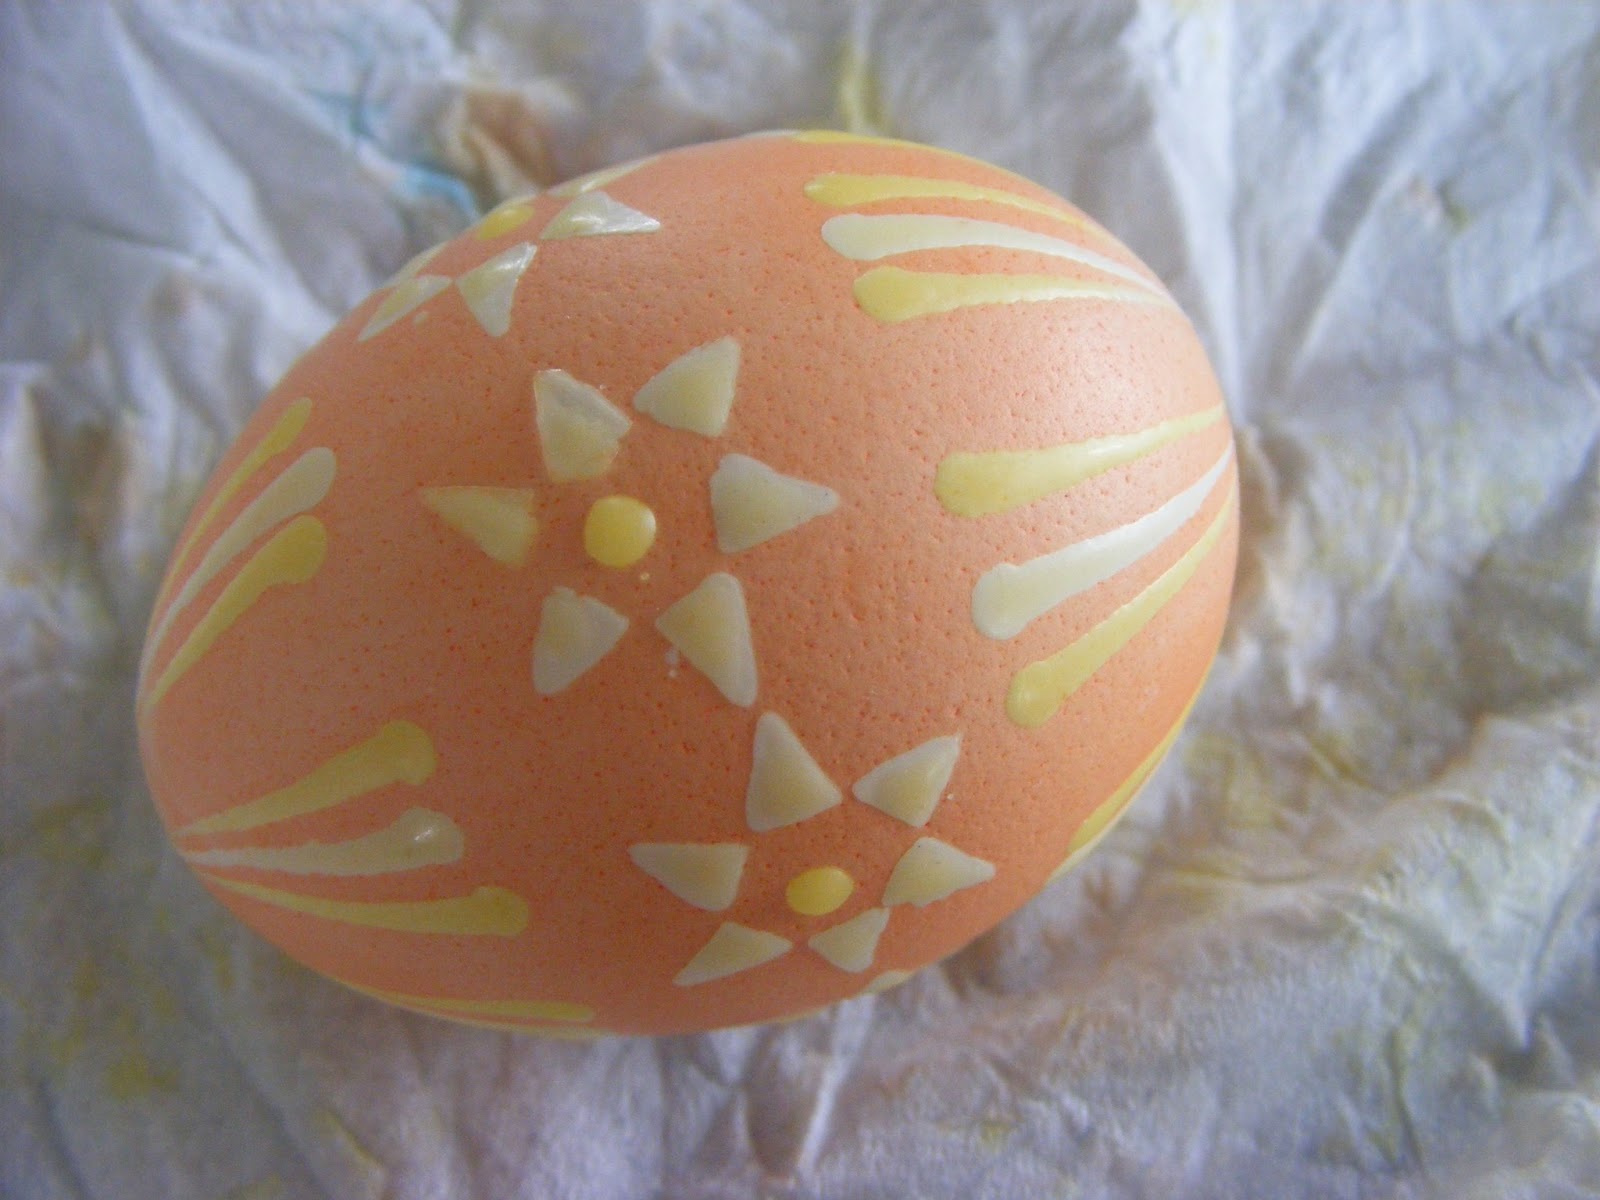
How to make batik Easter eggs

Happy Easter! 

Near where I come from in Saxony (South-East Germany) live the Sorbs (not to be confused with the Serbs), an ethnic minority that has been living in the area of Lusatia since the 6th century. They have their own language and traditions, among them the art of making the most wonderful Easter eggs. You can read more about the Sorbs here
While my family is not Sorbian, we have been making those Easter eggs in our family for a long, long time and now I am doing it with my own children on the other side of the world, in Australia. The technique is a simple batik one that children can enjoy as long as you can trust them around an open flame. With supervision, naturally. 
You don't need any fancy equipment. The hardest thing to find in Australia is white eggs. Light brown eggs work  too, but it looks best if you can manage to start with a white egg.

This was me and my 3 kids on Good Friday. Step right in. Excuse the messy kitchen...

Step 1: 
An empty egg. Make a hole, blow the egg out...


...Scrub it gently and dry it. 
Cleaning it  is important or the colours won't stick.

Step 2:
Melt some beeswax in an oil lamp. Real beeswax is by far the best and you can get it from a beekeeper. If that's not possible then get a good quality candle and melt that. Cheap stuff won't work. 

Here are the tools you'll need:


A cork with a pin in it (a glass pin is preferable) and some chicken or goose feathers. Cut the tip of the feather into simply shapes, like triangles and diamonds. Mine get used again and again, so they're looking a bit scruffy.

Step 3:
Once the beeswax is totally melted, dip the pin into the wax, let it heat up and use it straight away to paint on the egg. You can make spots and lines, perfect for flowers. Joel made some Japanese words. Not really the traditional design, but still fun.
Everything you paint now will stay white in the end.

Step 4:
Make some dye. 
I have some real Easter egg dye, but if you don't have that, improvise with a few drops of food dye in a cup of water. Whatever you use, it's important that you add a table spoon of vinegar to fixate the colours. And the water has to be cool by the time you dye the egg or the wax will melt.
I like to use a spoon and a bamboo skewer in the hole to hold the egg under water. Let all the air bubbles come out and it will stay under. The longer the eggs stays in, the deeper the colour gets. Not rocket science, really.

Here is how I made a multi-coloured egg: 
Dip the feather into the wax and press it against the egg. 
You can make lines with the pin like this:


Everything you've just painted will stay white.The finished egg will look best if there is plenty of white, so got to town.
Now dye your egg yellow.
Paint some more designs on the yellow. Those will be yellow in the end. Now dye it orange.
Now paint on the orange. You get the idea. Keep adding as many colours as you'd like, but always paint something first.
 Next I dyed my egg red and then dark pink. You always go from lightest colour to darkest, not the other way around. 
And how do you get the wax off? 

Step 5:
Hold the finished and dried egg close to a flame and let the wax melt, then wipe it off with a tissue. 
Wipe it all over the egg as you go, This gives the egg a nice shine and will protect the dye from fading. You can even hang those eggs outside.
The colours will really shine now and the first layer turns out white. 
Now it looks nice and beautiful.

Step 6:
Cut a match or toothpick in half, tie on some thread and feed it into the hole of the egg:

Now you can hang it up. Done! 

And here is our Easter bouquet:


Tuesday, November 20, 2012

Bottle cap magnets - teacher's gift idea


Are you looking for something personal and fun to make for your kids' teachers or your friends? Should it should be cheap and quick to make, but not look cheap? I've got a great idea for you to copy:
Bottle cap magnets!


Here is what you'll need (click on the words to find the products at my2angels):


3. Some paper with small designs (use up some bits from your stash)
4. An unsused bottle cap (from the home bewery section at Woolies)
5. A magnet (from the cheap shop) 


Cover the cabochon with Dimensional Magic, place it on the design you want and swirl it around a little to spread the glue and pop any airbubbles.

Let it dry for about half an hour.

Now on to squishing some bottle caps!
If you have a Cuttlebug or similar machine, you're in luck. Make the following sandwich:

B plate
metal die (metal side facing bottle top)
bottle cap (pointy bits up)
A plate


It will be squished to perfection. 
If you don't have a Cuttlebug and can't rush out to get one this very minute, don't despair. Lay your bottle cap with the pointy bits down on a wooden cutting board and give it a few gentle taps with a hammer. It's not as perfect, but looks ok too.

 Check your glued-on cabochon. Is it completely dry? Then cut it out. It doesn't have to be perfect, just follow the outline of the glass pebble.

Put some strong glue (I use Helmar 450) on the inside plastic rim of the bottle cap

Glue the cabochon on.

 Glue a magnet on the back of the bottle cap.
Easy, right? For a present I made 6 matching ones.

Now you need some presentation. 
Cut out a tag from Snowflake paper (there are 9 on the sheet, so that will go a long way). 

 Glue 6 small metal washers on the backside of the paper (raid the shed!) They will hold your magnets in place. 


 Pop the magnets on the front, add some red baker's twine and a Christmas tree charm. Wrap it in a bit of cellophane and you are done!
Try and match the paper you use to your teacher's taste. My daughter's male teacher is getting monsters!

For more easy handmade Christmas gifts (with instructions and lots of photos) click here.

Sunday, October 28, 2012

Filigree necklace tutorial - beading for beginners


With Christmas just around the corner, I am always on the lookout for simple (and cheap) but beautiful handmade gift ideas. At my2angels I saw some very pretty filigrees, have a look at them here! I took a few home to make into necklaces. The best thing is, they are so pretty by themselves, all the hard work is done and I just have to put them together.

For a real quick present I could simply attach a jump ring to a filigree flower and string it on a ribbon and it's done, but we can do better than that!

If you have never tried your hand at beading, this is the tutorial for you! It's not hard, seriously. You just need a few basic tools, available at my2angels:

 round nose pliers ($1.50)


Pick a filigree flower, like this one from a set of 6 mixed styles and open up a small jumpring with the pliers:


Slide the open jumpring through the flower and a filigree cross and close it with the pliers:


(Excuse the dirty fingers, I had just finished some gardening)
Repeat that on the other side, so you have 2 crosses attached to the flower:


Now slide another jumpring through the opposite hole of the cross and close it around the first link of a chain. Always bend the jumpring, not the chain links.


Repeat on the other side:


Measure how long you want your chain to be and cut through a chain link with the wire cutting pliers. Attach a small jumpring and a parrot clasp on one side and a larger jumpring on the other side:


Now a tassel! String a brown pearl on  a head pin. They have a little stopper at the end so your bead won't fall off. If the bead's hole is too big and it falls off, add a bead cap. (I didn't have a antique bronze head pin, but the silver will do.) Cut it about 1cm above the bead with the wire cutting pliers (don't use your scissors, they will get wrecked!)


With the nose of the round nose pliers bend the wire till it looks like a hook...


... link it around a chain link...


...and close it with the pliers:


Do that 3 times, add a large jump ring and your tassel is complete! 


Attach it to the flower and your beautiful necklace is done.


For a finishing touch I put a few drops of dark chocolate Liquid Pearls in the middle...


...and glued 2 brown pearls on the crosses:


You can of course go all out with the bling and the colours, but I wanted something soft and tone-in-tone with the bronze.

And here I am with a beautiful new necklace:


Now that you have mastered the basics you can make all kinds of wonderful things. In fact, I rarely buy fashion jewelry, most of my stuff is handmade.

I got a little adventurous and decided to make something fancy. I picked a few different filigrees and arranged them in a triangle. Then I attached them all with small jump rings. I made sure I closed them all real well with a bit of an overlap, so they wouldn't come apart.


Find the ones I used here:


I added a chain, just like the first necklace, and a leaf charm:


And here we have it:


It was getting dark, so I stopped here, but if you like you can glue rhinestonespearls or a resin flower in the centre of each circle. I decided to keep mine plain.

Once you get started the ideas keep flowing. I hope this has give you some inspiration for Christmas gifts.
Cheers, Geli