Showing posts with label Sew Easy. Show all posts

Saturday, March 2, 2013

Fab titles with sugar beads

In an effort not to end up on the "Hoarders" TV show I've been trying to use up bits and pieces from my stash. Here I made a background from 2 papers and a barcode strip, added some stickers, an old rosette and some arrows. So far so good.

wet+(4).JPG

Stashbuster pages are great but they sometimes end up looking a bit slapped together. Which they are!
Especially my title chipboard looked to be from the last century (it is). I glammed it up with some mint crush sugar beads from my2angels.
(The letters were already printed in different shades and patterns of green.)

First I covered the bottom of the letters with Glossy Accents and covered them with sugar beads. The bigger beads tend to come out first and I made sure there were plenty of them. I let that dry and then repeated it with the smaller microbeads that come out last. I let the original colour show through on the top of the letters, giving it all a multi-coloured effect.
2 more coats of Glossy Accents kept everything in place.

wet+%25283%2529.JPG

The waves below the title are quick to stitch with the Sew Easy tool and the scallop head.
All my2angels Haberdashery products can be found here in the Haberdashery Section
Did you spot the little ship's steering wheel charm? You can sew them on with an embroidery stitch!
wet+%25281%2529JPG

So, if you have some unloved stuff on the bottom of your stash, glam it up with some fabulous sugar beads!


GELI


Tuesday, November 27, 2012

Merry Christmas to all

The "Just Believe" collection from Kaisercraft is my favourite this Christmas. I just love the soft blue and rich red.  Find the range here at my2angels with the Christmas papers.
I made this layout with it:


The new mini gardenias make a pretty garland. There are gardenias in olivebrown (more cream than brown) and red, plus some black star flowers (sprayed with gold glimmer mist):


On the ends of the garland are a bell charm and a


And just a tiny bit of stitching with the Sew Easy tool and the star head.


Geli

PS: I scraplifted myself to make a non-Christmas version. We'll make this in class at Kaisercraft on Monday, Dec 3:


Tuesday, October 23, 2012

Let your imagination soar

Do you find boys hard to scrap? Have you ever been for a ride in a hot air balloon? I've got the perfect page for you:


Come along to my class at Kaisercraft Robina on Monday, Oct 29, and we'll make something cool. 
How about mini balloons and a little stitching:


You can choose your own colours and papers.

Sunday, October 7, 2012

UFOs

I bet you too have UFOs in your house. They are the UnFinished Objects in everyone's craft pile. This week I managed to actually finish a few of them. These are all based on diverse class layouts I had started during my class and they were left to rot in the UFO pile. I thought it might cheer your crafty little soul to see them finished.

"Our Wedding"
This one is the cover page of my sister-in-laws wedding album. By then I had used up all the photos, but ended up with an uneven number of pages. A bit of planning would have been useful, but now it's a photo-less page. And why not?
Clever chicks will see that it's based on the resist technique I had in this month's issue of Scrapbooking Memories (and that means you'll have to get the mag, I can't share it here)


To make the flower center I glued a glass cabochon on some pretty Prima Songbird paper with Glossy Accents (Dimensional Magic works too), let it dry...

...cut it out and glued it on a round silver filigree and then on a flower:

Once that was on the page I added a charming bouquet and a charming pin with some gold stamens:

I used the Sew Easy tool with the "love" design for the stitched circle: 


 A sprinkling of pearl Mica fragments gives the title a bit of shimmer. It's hard to capture in a photo, but it looks like mother-of-pearl. Very pretty.


"Fantabulous"
This one had likely grown roots in the UFO pile, it's been there so long. It's based on an iris-folding technique we did in class and this one needed some TLC to come to life. 


 I thought some pretty flowers to pep it up and I had a rolled satin flower in my stash, but the black gardenia and the grey rose were just the contrast I needed. 
 Honestly that's not the colours I would normally reach for, but look how nice they are. I added a little glimmer mist to the black one, by the way, and a couple of brown mini leaves. And lastly, there is a cute baby foot charm (painted bronze):


"Flower children"


You'll have to take my word for it, that's what the title means. This page is for my parent's yearly album they're getting for Christmas. Thankfully they're not blog junkies, so the secret should be safe. This one is based on the "Our Street" layout I taught recently:


For this version I used the giant white mulberry flower too (this time tugged under) and a cluster of a cherry blossoma white orchidand a white and a pink rose bud on a  silver filigree wrap:

I hope this inspires you to dig out some of your own UFOs and finish them! 
Geli


Thursday, September 13, 2012

Christmas, all cheery and bright - and quick too

First of all, I can't believe that I am doing a Christmas post in September! But some of you like to get started early on cards and there are new Christmas papers at my2angels I want to show you. It  is the new Mint Twist range from Kaisercraft, perfect for those of us who prefer a bit of bright and cheery to muted and old fashioned.
All I had was 1/2 sheet of this Mint Twist Jingle paper and I managed to get 3 cards out of that plus a few embellies.

If you are in a hurry, you can cut out the tags from the paper and use them as they are, but I like to always add a bit to it.

For the first card I stamped leaves into the tag to fill it out a little more and did some hand stitching with the Sew Easy tool and the Flourish head, plus 3 washi tape flags. 
 The Christmas bauble got a glass cabochon to make it 3D (use Dimensional Magic to glue it on) and 2 white bows.

The next card has a giant mulberry flower for a bit of background texture. I could have sprayed it with glimmer mist, but decided to leave it all white so the cute tag will stand out. 
I made 3 different frames: 2 rows of sewing, a rhinestone chain and spots using Liquid Pearls.
 The sweet little pink present charming chain adds just enough wow factor. They come in different colours, too. I popped a little pink bow on top. 
These bow packs are great for having a bunch of mini bows on hand whenever I need one.

The last card has 3 layered tags from the same Jingle paper
  and I finished it with some cotton lacered velvet ric racbaker's twine and a present charm with 2 small leaves. This card was really quick to make cause I was running out of time before school pick up. I reckon you could make 10 of those in an hour.

 I hope you got some Christmas inspiration. It's always a good idea to start cards early so you don't run out of time.
Geli


Tuesday, August 28, 2012

Daddy's girl - a Father's Day layout

What?! Pink on a Father's Day layout? It wasn't planned that way, but pink kept creeping in, so why not? We'll make this page in class next week. 


 And we'll make this little thingy from scratch: 


 There is quite a few techniques in there: rosette making, rough embossing, fake feathers and a glass marble. And some more stitching with the Sew Easy tool:
If you never tried this tool, check out my Sew Easy blog post. It's a little addictive. 


Sunday, August 26, 2012

Sew Easy how to's

Have you seen the Sew Easy tool? It's sew easy to use (terrible pun, sorry) and you can change designs in seconds. If you hate dragging out the sewing machine and even if you are not a enthusiastic stitcher, you will love this. It's now available at my2angels in the haberdashery section.

First, here is a layout where I used the tool and some of the new wonderful cherry blossoms.


The background is Prima Songbird Lineage (back & front) cut like this: 

and glued together with a strip of Sunrise. I used the Sew Easy tool to stitch the scallops with - you guessed it - the scallop head (more about this below) and a little bit of cotton lace.


 The new tangerine cherry blossoms, roses and rose buds match the Songbird papers perfectly. That colour is just divine.


 There is also an upside-down Charming Bouquet


If you don't know how easy it is to attach a rhinestone word, please have a look here for all the tricks.

But back to the Sew Easy tool!

First, you will need the tool (duh) and a squishy mat. I've been told that a mouse pad works, but I haven't tried. It's hard enough getting a go on our computer without trying to steal the mouse pad...

The tool comes with a head that makes straight lines. (I used that to make some perforated lines for the tickets on the layout above.)
That's alright, but what we really want is something cool. So get yourself another head, like this heart one. Twist the boring one off and twist the cool one on. Now get your piece of paper, pop it on the squishy mat and start rolling.


You'll need a bit of pressure and I don't think you should go through more than 2 layers of paper (try it on a scrap first!) You now have a cool design, ready to stitch.
If it hasn't punched the holes all the way through (thick paper might need this), go over it with a pokey tool.


 At the back of the handle is a little compartment for needles. I think it even comes with one, but don't take my word for it. I keep all my embroidery needles in there now.


 Use 2 or 3 strands of embroidery cotton and start stitching. I'm a bit lazy and I do a running stitch one way...


... and fill in the gaps with a running stitch on the way back. Too easy.


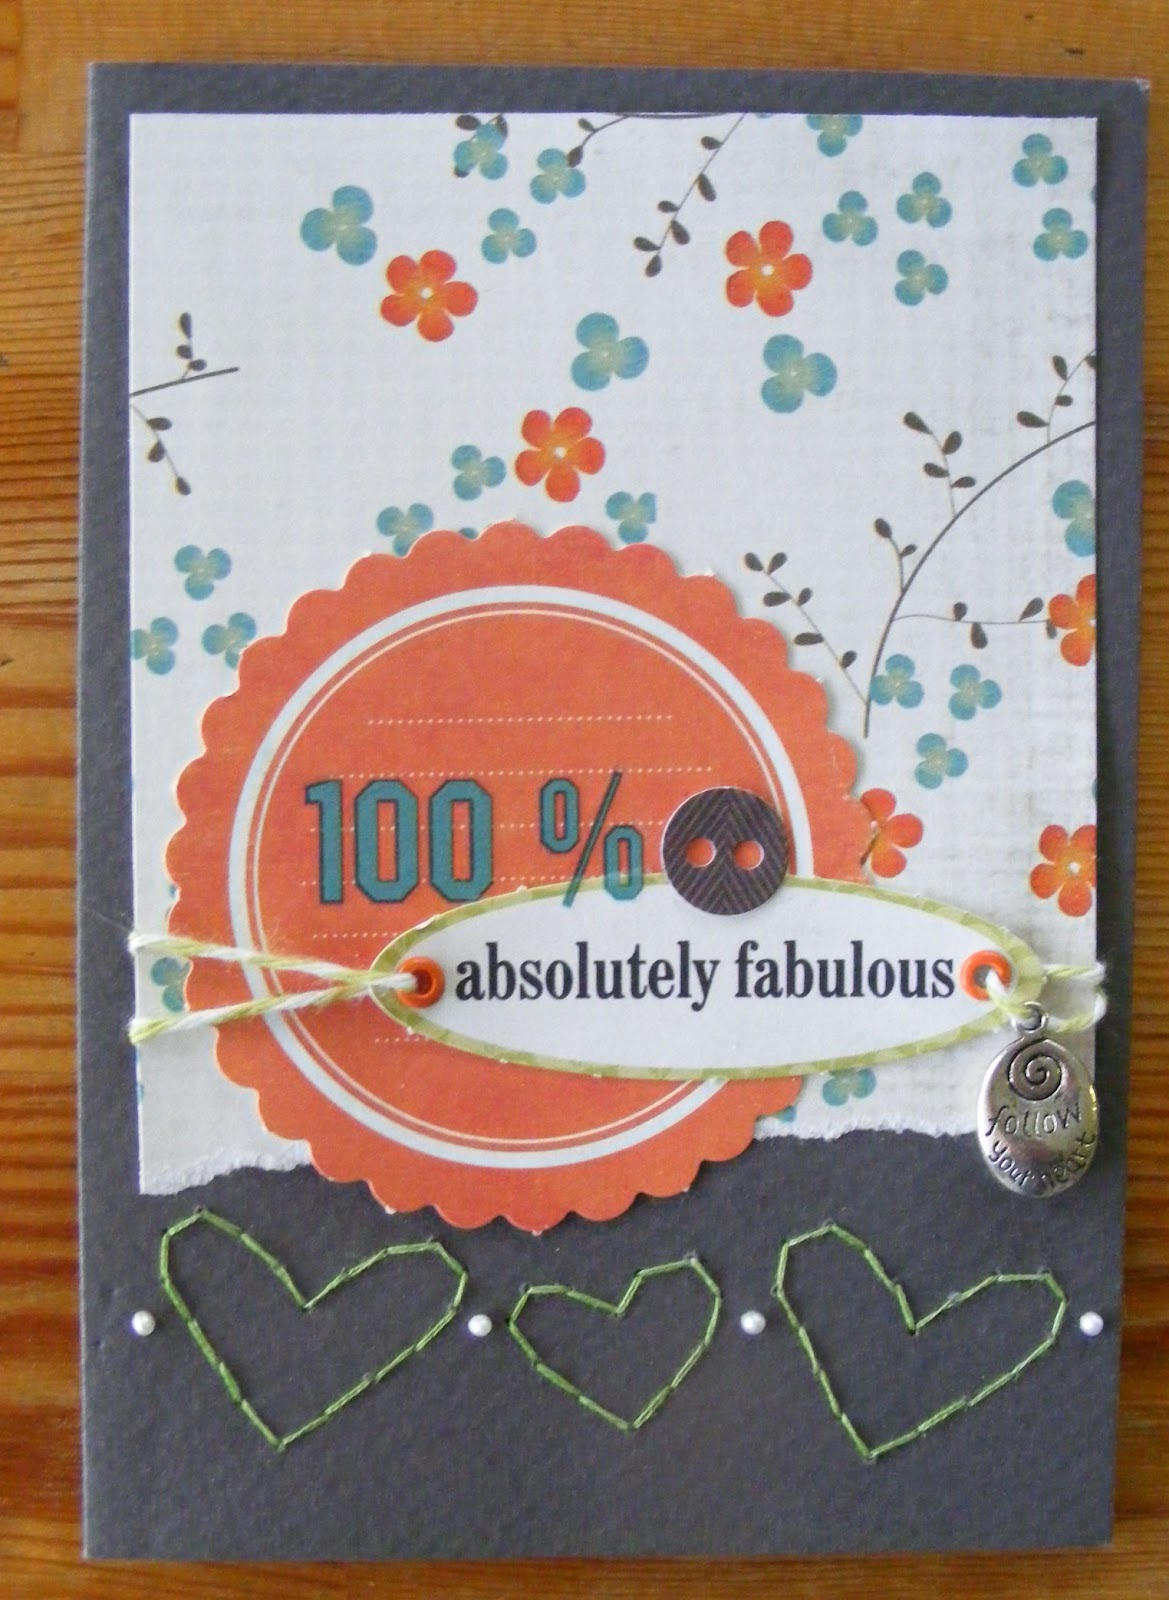
 So here is my completed row of hearts... 


... and I quickly made it into a card with a few leftovers, some bakers twine and a sweet little charm.


And there you have it. Give it a go, it's a great tool and you'll be stitching away in no time, with your friends thinking you've slaved for hours. Hehe.