Showing posts with label micro beads. Show all posts

Thursday, April 4, 2013

All New

I've been digging through some old photos. Here is a good one from 1999, when Joel was 1 month old and busy turning our lives upside down. 


We're doing this page in class next week and it's a great excuse to dig through the stash and use up leftover strips of paper. And lots of buttons (happy birthday, Ann-Maree!)


There is an easy way to get the chevron strip look and I'll show you in class (can't give away all my secrets). 


It's hard to capture on camera, but the circle frame has lots of see-through micro beads. Very swish and a cool way to clam up boy's photos.

Tuesday, March 5, 2013

Yum!

 How cool is it to stop by the side of the road and eat blackberries to your heart's content! We're making this funky little page in my home class next week.


There are groovy little felt circles...


...some stamping and Sew Ribbon stitching...


...and sparkly letters... 


... similar to the ones I did for the last post: 


This one has the new sugar beads from my2angels. If you like those on your letters, follow this link to see all the colours available. 

We can cut chipboard letters on my Cricut if you don't have any, they will look like this:


 ♥♥ Geli ♥♥


Saturday, March 2, 2013

Fab titles with sugar beads

In an effort not to end up on the "Hoarders" TV show I've been trying to use up bits and pieces from my stash. Here I made a background from 2 papers and a barcode strip, added some stickers, an old rosette and some arrows. So far so good.

wet+(4).JPG

Stashbuster pages are great but they sometimes end up looking a bit slapped together. Which they are!
Especially my title chipboard looked to be from the last century (it is). I glammed it up with some mint crush sugar beads from my2angels.
(The letters were already printed in different shades and patterns of green.)

First I covered the bottom of the letters with Glossy Accents and covered them with sugar beads. The bigger beads tend to come out first and I made sure there were plenty of them. I let that dry and then repeated it with the smaller microbeads that come out last. I let the original colour show through on the top of the letters, giving it all a multi-coloured effect.
2 more coats of Glossy Accents kept everything in place.

wet+%25283%2529.JPG

The waves below the title are quick to stitch with the Sew Easy tool and the scallop head.
All my2angels Haberdashery products can be found here in the Haberdashery Section
Did you spot the little ship's steering wheel charm? You can sew them on with an embroidery stitch!
wet+%25281%2529JPG

So, if you have some unloved stuff on the bottom of your stash, glam it up with some fabulous sugar beads!


GELI


Wednesday, November 21, 2012

My cheer star

 Hannah has been doing cheerleading all year and has learned amazing flips and things that make my heart stop. Here is what we're doing in my home class next week:

 It's got a shaker box star:

They are easy to make and a lot of fun to fiddle with. 

I used the same principle on my friend's birthday card:


This page has lots of different stars and can suit boys too.


Cheers, Geli

Tuesday, October 23, 2012

Dare to skate

 This is my home class next week:


 In September my kids got their first taste of ice skating when they were invited to our friend's birthday party. It was awesome to watch them go from clutching the walls in fear of their lives to carefully scooting along a few millimeters at the time to skating in the middle of the ring with a big smile on their faces. All in a matter of 3 hours. 
And because it's Halloween next week, the page needed a skull... 

 Not a fan of Halloween? You can make something else :)

Finish it off with some droplets and the ever-bouncy micro beads:


Make this page any theme you like, boyish, girly, Christmas... it suits most everything!

Sunday, June 3, 2012

Create an album with me pt2 - Sunflower field

Welcome to my 2nd page for the album project. 
If you have missed the step-by -step instructions for the title page, you can find it here.


If I see a sunflower field, I immediately think of Russia. I had these gorgeous photos of us in a large field taken in 97. 
So here is my sunflower page, which you are welcome to copy. You can use other colours of course, they don't have to be sunflowers. Follow the links to find the products I used.


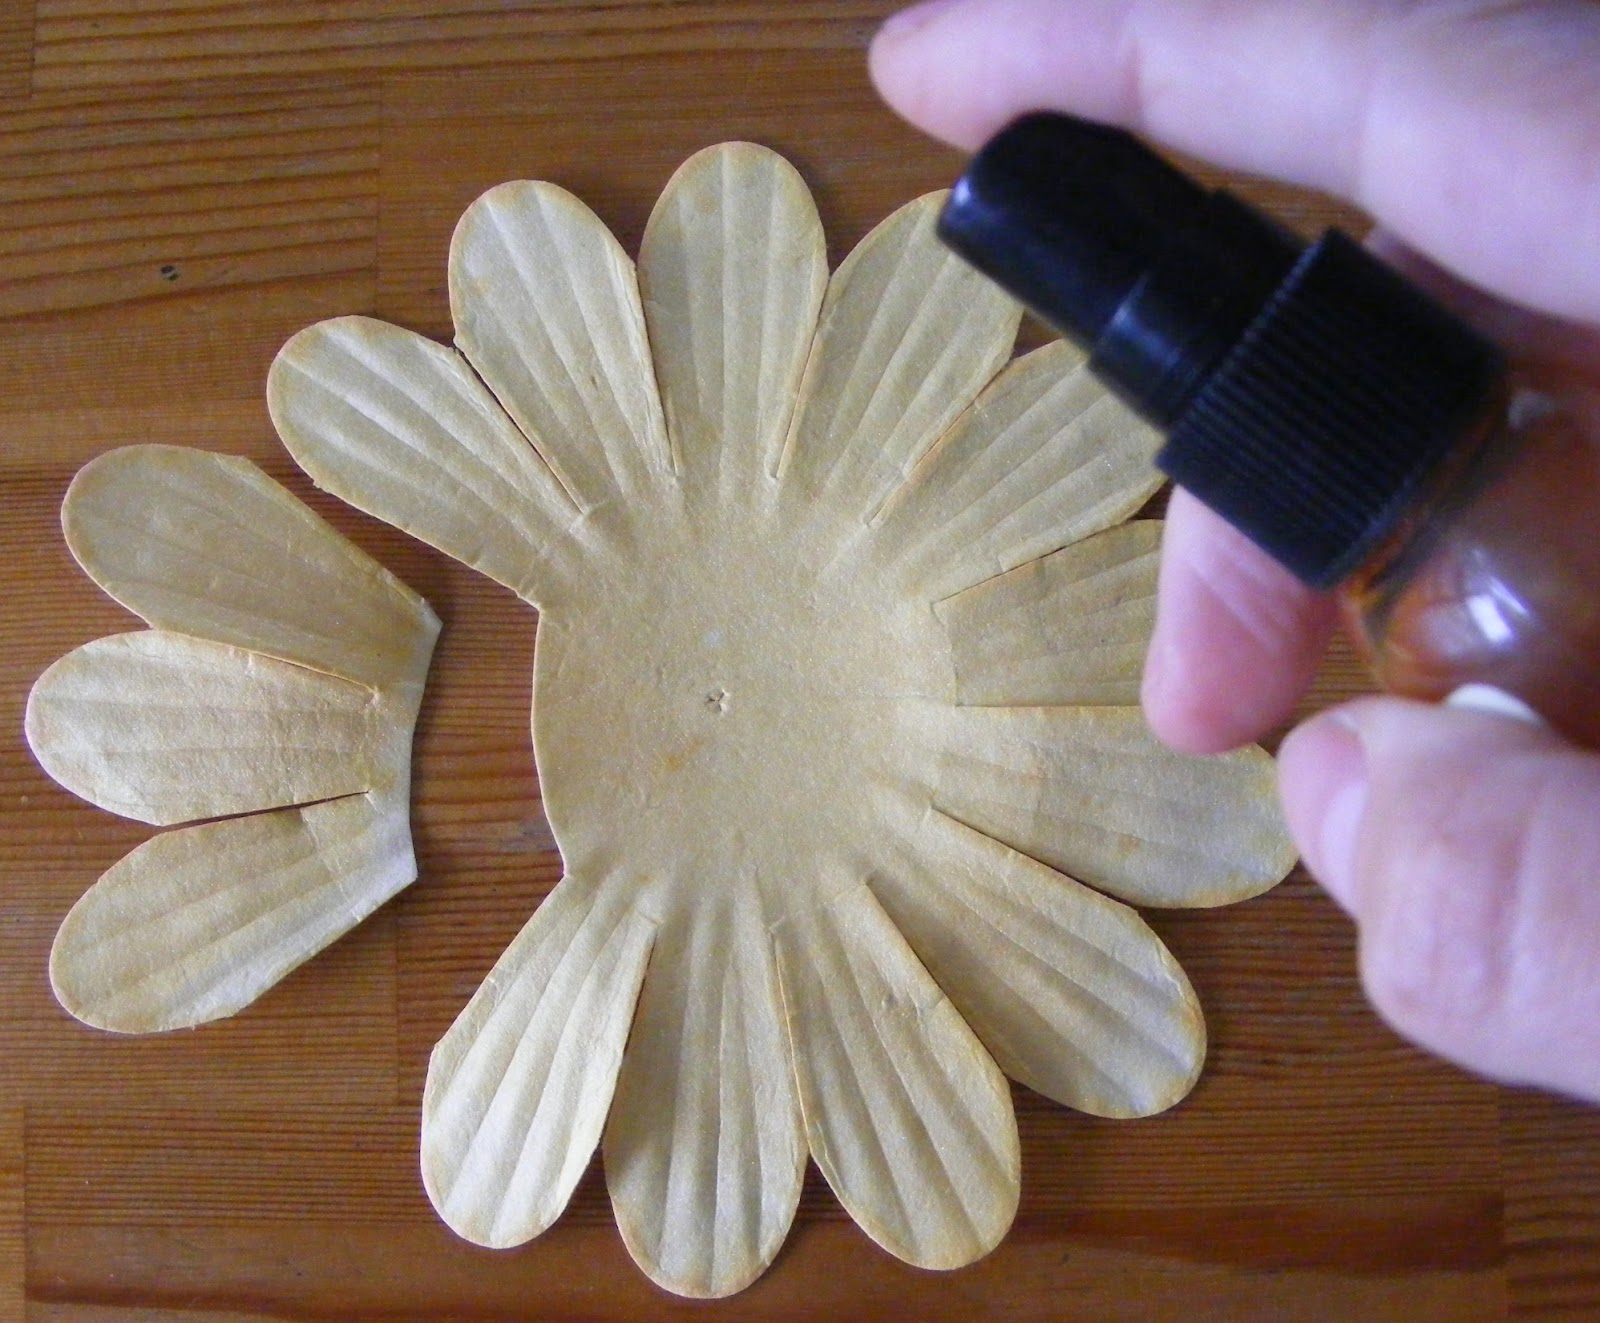
I am basing most of my album pages on a white background. First of all, it creates a little continuity despite the many colours and it stretches my Echo Park kit so much further. To avoid the background feeling empty, create some glimmer mist splashes like this: Unscrew the nozzle and shake it all over the cardstock. It's random and fun.


While you got the glimmer mist out, spray a large mulberry flower. 
These flowers are white and huge, perfect for misting. The best part is that they are very strong and won't tear or loose their shape when they get sprayed.
(I cut off 3 of the petals, because I had planned to use them as leaves on the page, but that didn't happen, so I will keep them for later.) 


Punch 4 small holes in each petal and sew a little cross with baker's twine on each one.


Choose a patterned paper and cut off 4 1/2". Gently fold it in half (don't crease it) and draw a curvy line on the back. Cut it out so it looks something like this:


Distress the curved edge and glue these things onto your background: the curvy paper, the main photo with the flower tucked under and over and a round photo (3 1/4" diameter) added to the middle of the flower:


Paint a thin outline around the round photo with liquid glue and glue some twine around it:


(Yup, that's me and Greg when we were young & beautiful)
***
Do you have any Martha Steward deep edge punches? They are (obviously) great for edges, but you can make pretty flowers and lace strips with them too. The principal is the same with any punch you have, but looks best with the wider designs. I will demonstrate on a short strip of paper, you will need a 12" length.

First, measure from the edge (where the edge of the paper sits when punching) to the end of the design. In my case, 1 1/4". Double that and cut your paper strip to the width. 2 1/2" in my case. 


Line up the paper with the end of the punch, like this: 


Punch the whole strip, as if it were a border. Then turn the strip over and start at the other end of the punch:


 Punch the whole length of the strip and you will end up with a strip of flowers:


Easy. Try some other designs, they all look fab.
***
To make the flowers look like sunflowers, take some large brads, cover the tops in Dimensional Magic and dip them into Microbeads:


 I don't have brown microbeads, so I let them dry and painted them brown. Now glue a paper flower under each punched flower to fill out the design and attach the strip to the background with the microbeaded brads:


Use a fence sticker from the kit, too. 
Now embellish the left corner with a yellow flower, a yellow gardenia, a frangipani and star shaped flower (both inked yellow). Add some mini leaves and large white leaves (glimmer misted in green). Last pop on a little daisy charm and a yellow make a wish tile and you're done!


As you can see, having heaps of white flowers and leaves comes in handy because you can mist or ink them in the shade you need. 
For any of the embellishments I used, pop over to my2angels, the friendliest stop for embellishments I know!
***
Cheers!