Sunday, February 24, 2013

How to make a washer necklace with sugar beads

Hi everyone, it's Geli with a cool gift idea using the new and awesome sugar beads!

My school has a mother's day stall every year and we always try and make pretty gifts from thin air. Basically, it should cost next to nothing, look awesome, appeal to kids and be liked by mums. This year I am making washer necklaces!

washer+necklace+%25287%2529.JPG

You will need:
♥ metal washers from the hardware store (mine are 35mm in diameter, which were the biggest ones)
♥ spray paint (optional)
♥ sugar beads in the colour of your choice
♥ Glossy Accents or similar

First, spray paint the washer in a colour that matches. I only have black or white, so white it was.
Cover the top of the washer with a coat of Glossy Accents and sprinkle sugar beads all over. Shake off any that don't stick or those that sit on the sides. We just want them on top.
washer+necklace+(2).JPG

Let that dry a little and then add a thick coat of Glossy Accents on top. I did several coats to give it a nice glossy and smooth surface.
Add a 90cm long cord and you are done!


washer+necklace+(9).JPG


washer+necklace+(11).JPG

If you prefer, you can glue some leftover paper onto the washer instead. In this case, you can skip the spray painting, but you have to sand the edges before adding the gloss. I did one coat of gloss, then a line of gloss to attach the sugar beads and finished the whole thing off with some more gloss. I quite like it that way too:

washer+necklace+%25283%2529.JPG

While I had the spray paint out, I started a little experimenting. I sprayed a filigree black...

washer+necklace+%25286%2529.JPG

... and glued some Strawberry Shortcake Sugar Beads on the back of a glass cabochon

Another coat of Glossy Accents to secure them, let it dry and hot glue the glass to the filigree. Voila! 


washer+necklace+%25284%2529.JPG

washer+necklace.JPG

I'm going to play with a few more colours for Mother's Day. I think this one is a winner. And true to the plan, it cost very little per necklace.
Geli


Wednesday, February 20, 2013

sugar beads cards - yum, yum

Hi everyone
Geli here with
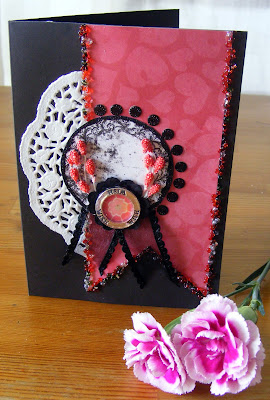
3 cards using the new my2angels sugar beads

love+cards+%281%29.JPG

All 3 cards use the same basic fishtail banner (2 1/2 x 5 1/2"), a tag from the Bo-Bunny Enchanted Fairytales paper and a paper doily.

The Sugar Beads certainly look delicious with beads, microbeads and cylinder beads all mixed together and they have yummy names too.
Here is how to make the first card:
love+cards+%286%29.JPG

Cutting a perfect fishtail banner is easy!
 
https://blogger.googleusercontent.com/img/b/R29vZ2xl/AVvXsEjd7pBM_k2VG9LxFwjORpym-mjqWeR_G0NCqKFQQTAGaP25VCV0wIqppP-SQjQyZHtbPlHRZLgBHzoUXzt5HE6jZvcB8tBWGabZ2gxw-HtT9H0dbVYNcXUFuf5JeTOQOeS_NDAg7dck4A/s1600/love+cards+%252817%2529.JPGlove+cards+%252816%2529.JPGlove+cards+%252815%2529.JPG

1. Cut halfway at whatever angle you want.

2. Fold it over so the corners meet.
3. Cut along the diagonal line.
Done! Perfectly matching every time.
love+cards+%252814%2529.JPG

Glue a small paper doily under the banner. Trim off anything that sticks over the edge (except on the left).
love+cards+%252813%2529.JPG

Draw a line of Dimensional Magic around the banner and sprinkle the Licorice Twist Sugar Beads all over it.
love+cards+%252812%2529.JPG

Here's a closie. Good enough to eat:
https://blogger.googleusercontent.com/img/b/R29vZ2xl/AVvXsEgcXNg8wRDwEQf5Z9t1_ztZBs2MHB1FMSx4jgeRmPAHrf_IXzdDfPOEze7XHmbhFRNwDilJ3Sr2cb4WKvfus_AN06KgZviOCJ13s01l9POMr0hcapQ2MmCo2FLuifDqk6Vms57jAdeLsA/s1600/love+cards+%252811%2529.JPG

Now draw another line of Dimensional Magic on top of the beads to secure them nicely, especially if the card is being posted!
love+cards+%25283%2529.JPG

Cut out a tag from the Bo-Bunny Enchanted Fairytales paper and embellish with a Black Love Charming word.

Here is another card, using the same basic layout, but this time it's the Strawberry Shortcake Sugar Beads

These ones are red and silver.
love+cards+%25287%2529.JPG

love+cards+%25289%2529.JPG
Cut out a tag and glue on some red stamens and some black scalloped edged organza ribbon.
love+cards+%25288%2529.JPG
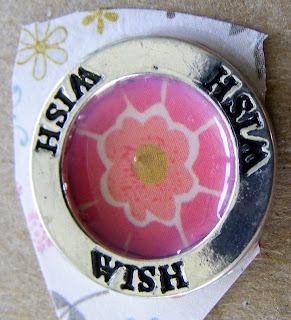
Glue a wish ring onto a scrap of paper, cover the inside with Dimensional Magic, but let it dry before gluing it onto a black mulberry paper flower and then to the tag.

love+cards+%25282%2529.JPG
Add a few black rhinestuds and it's all done.

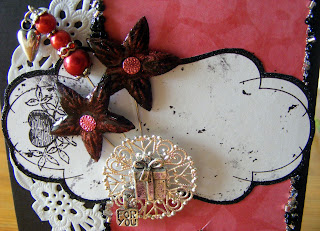
The last card starts off just like the other two...

love+cards+%25285%2529.JPG

...and is embellished with a silver brass filigree,
a present charm,
a red charming pin 
and some black stemmed star flowers.

I will show you in an upcoming post how to make them shiny in different colours, so keep an eye out for that:)

love+cards+%25284%2529.JPG


GELI
♥♥♥

Tuesday, February 19, 2013

Blast from the past

This is our class project for next week. 

 
 Joel's school class organised a rock n roll diner last year and we had these fun photo booth photos taken. Cutting them down to half size (just under 3x4") means you can fit 3 photos on one page comfortably.

 I found these awesome new clock and cog dies from Papermania at my craft shop. They're gonna be so versatile.


You can make this page a heritage one with old photos or scrap the handiman in your life.
Geli
 ♥♥♥

Tuesday, February 12, 2013

smile

For next week's class I got inspired by some beautiful pages by Stacy Cohen that I found on Pinterest. 


Isn't he just too cute? He's my friend Erica's son and I made this page for her.


 This is a great way to use up scraps and leftovers. A few punches and dies and foam tape add subtle dimension.


Thursday, February 7, 2013

Throwing pebbles - how to use unloved papers

I've been cleaning out my paper stash. OMG, it really needed it. Some papers have been sitting there for 5 or more years and I couldn't see myself using them. Most of it went to fellow scrappers who were happy to give them a new home and hopefully some use. 

But then this little ugly duckling fell into my hands...


... not something I would have picked out at a shop (it came in a gift pack), but it seemed to go well with the blues and aquas I had in mind. So instead of chucking it out I decided I was going to give it some Peeping Tom powers and frame it with yet another unloved paper that had just the right teal colour. By using those 2 in small dosis, I actually kinda like them. 
And of course, there is a cute felt garland (found the idea on Pinterest here) Again, just using up odds and ends from the brad stash. 


I'm really pleased with the outcome and now I'm wondering maybe I should have kept all those ugly ducklings from the paper stash... No, really, it feels great to clean out.

Wednesday, February 6, 2013

How to make cheer pants

My girls love to wear shorts and recently I bought some hot fix rhinestuds from my2angels. They have a glue backing that needs to be heated with an iron or an i-rock tool. They are a great bargain at only $1.00 for 50 and look wonderful on paper or on clothes.  


I decided to write the girls' names on the back of the pants in rhinestones. Our neighbour girl got a pair too. Here is how:

Your supplies:
* A plain pair of shorts, preferably without back pockets
* Rhinestuds  (Find all the 9 colours here)
* A heat resistant mat to protect the front of the pants 
(click here to find one)
*A big wooden cutting board to protect your table
* An iron or an i-Rock tool


Lay out one letter in rhinestuds, starting with a middle letter next to the middle seam of  the pants. This one spells Leah, so "e" it is. This way your word ends up centered. (I bet by now you'll regret it if you gave your daughter a long name)


Since I used the i-Rock tool, I let it heat up and pressed the hot tip onto each rhinestud, letting the heat melt the glue underneath and attach them to the pants. If you don't have one, simply use an iron. I recommend you iron on one rhinestud at the time because they do become permanently attached once they are heated. 

Once all the letters are on, I ironed the pants to make sure all rhinestuds are well glued on. And that's it already! 


 My girls will wear nothing else, so I made a few...


They were a great hit as gifts too!


And this is how they look on paper (from the Paradise Found layout):