Tuesday, June 28, 2011

Her eyes make the stars look like they're not shining

My niece has beautiful big blue eyes. This is just a fun, quick page using a number mask and glimmer mist for the background...


...and some aluminium foil for a title. (Find out how in class this week!)


I didn't want to over decorate this page and rather let the photo stand on its own.

Wednesday, June 15, 2011

I got the runner up prize!


I just got the e-mail that I won the runner up prize with my "Hippie Chick" layout. Wow, there were so many wonderful layouts, I didn't expect to win anything, just wanted to revel in the glory of being there in the top 20, LOL! I guess there must have been a lot of ex-hippies (and closet hippies, like me) at the expo. I'll be high for the rest of the week, that's for sure (oh, without drugs, naturally).


Thanks to everyone who voted for me!
xoxoxo

Monday, June 13, 2011

Scrapbook expo photos!

What fun we had at the expo this long weekend! Here are some photos of a few of my scrapping buddies. It was soooo awesome to catch up again or finally meet in real life!


Me and my layout at the "express yourself" competition and here's Renee's and Gilly's: 


Leanne, Annette, Mary and Kim:


Tracy from my2angels and me:


Jess Mackenzie and me:


fun, fun, fun!
Now the pockets are empty and I have a huge stack of new toys to play with and fun new stuff for us to use in class.

Tuesday, June 7, 2011

Beach bums - a cool multi layer layout

Next week in class we'll be making a coolio multi layered page with 6 full-sized photos. I'm really excited about this one, I think everyone will love it. 


Shelly from Stampers and Scrapper's Wonderland showed me this awesome card and I just knew I had to turn it into a scrapbook page. Each of the 4 layers can be opened to reveal the next one.
Open here...


... to get to the next one


open again...


...oooh look! Layer #3!


But that's not all! Open here...


...and get to the journaling layer. Yes, I haven't actually written anything yet, but it was 1am when I got this far and I didn't trust my hand writing to look decent at that hour.


How do you get back to the beginning? Open here, of course.


And there you are. How cool is that!


I've kept the embellies to a minimum so we get time to finish this in class. Feel free to add heaps of frills and bits, if you like, but stay of away from bulky ones. Class times are:
Tue. 10:00am
Wed 10am at Wonderland
Thur. 6pm
Fri. 10:30am

Monday, June 6, 2011

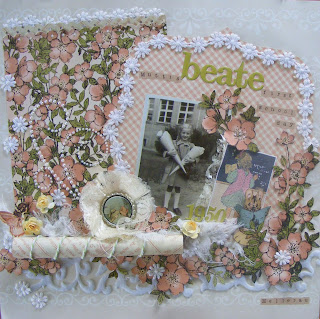
Beate

A few months ago I did a page of my youngest daughter's first day at school and explained about the tradition of the cone. (Check it out here)
I finally got around to scrapping a photo of my mum, Beate, in 1950 on her first day of school. Now I have 4 generations of cone-ness scrapped!


This Graphics 45 is cute as:


another little bottle-top, they're so much fun to make:


Thanks for looking!


Saturday, June 4, 2011

Trip to the Baltic Sea and some cool cheating techniques

In 1919 my Great-grandfather Julius took his 3 daughters on a trip to the Baltic Sea (only 5 of his 11 children survived into adulthood, one of them my grandfather. See his page here


 My Great-Aunt Meta, whom I knew well as an old woman (front row at right), always always had fond memories of this trip because it was their only family holiday ever.


I like the old vintage feeling of the Webster papers and of course aqua is my favourite colour. Here are some pretty lace and paper layers:


If you want to give your chippie letters an old feel you can ink or paint them first, apply Crackle Accent and let it dry and then rub a contrasting ink over it. I smooch it on with my fingers. It's a little messy but works for me. The contrasting colour will be seen along the outer edge and in the cracks.


Renee told me this awesome trick to make fancy bling on a shoe string budget:


Draw or photocopy a swirl that you like, cover it with some acetate and paint the "pearls" with Liquid Pearls or 3D fabric paint (from Riot). Vary the sizes to make them look really nice. Don't stress if you end up with a string of gnome hats! Give the bottom of your acetate a few sharp taps and they will flatten themselves to perfect little pearls. They will take a while to dry and don't be tempted to use the heat gun to speed it up. It'll deflate your pearls and curl your acetate. I pop mine on top of the warm espresso maker and they're dry in  less than an hour. My husbands thinks I'm abusing his beloved coffee machine... When they are dry cut it out and attach your home made swirl with mini glue dots under the larger pearls.
Pretty cool cheat, eh?!