Thursday, June 21, 2012

Mr Muscle


Launceston in Tasmania has this awesome gorge, a bit of wilderness in the middle of the city. It appears it needs some help staying together though. Out of nowhere appears....
Mr Muscle!!!


This is one of my favourite pages. I just love all the funky little embellies that have been floating around in my stash for some time. 
Cute little bottlecap (I did a step-by-step article in Scrapbooking Memories)


Fabric covered button:


Have you ever played with the Sew Ribbon tool? I wrote an article on it for Australian Scrapbook Ideas and it's so versatile. Check out the Sew Ribbon video here. (Be careful, you will need one badly by the end of it)


And this is done with the Sew Ribbon tool (see it in action here)


Tuesday, June 19, 2012

The sparkly party hat

Show me a 10 year old girl that wouldn't love this groovy sparkly hat! Hannah adores it at the moment. I took heaps of photos of her and the hat and couldn't decide on just one, so I used them all.


If you wonder why I made the photos sepia, have a look at the original colours... a bit in-your-face for me, but then I'm not a 10 year old. She looks adorable in it.


We'll be doing this page in class and use my new Cricut program (Bloom) I bought at the scrapbook expo in Brissie.


 I like how it cuts several layers to shadow them.


So, maybe you wanna come along or simply grab a bit of inspiration.

Cheers, Geli

Saturday, June 16, 2012

Create an album with me - page 3 "Beautiful winters"

Welcome to page 3 of Heidi's album! What would a Russian scrapbook album be without snow! And we did see a lot of snow. 


I am using my Echo Park paper kit and embellishments from my2angels. It's actually more of a summer kit, but you don't need to have snowflake paper to scrap winter photos. I just kept the overall colours fairly cool, with a bit of red thrown in, so it doesn't look washed out. A while ago I learned a cool splatter technique on the my2angels blog. This is coming in handy for a snowball look.

Take a paint dabber and shake it well. Now bang it on to your cardstock as hard as you can and you get these cool splats:


For an icicle look, swipe the paint dabber instead (start from the top and drag it down for a "tail"):


My cardstock now looked like this:


Next cut a 4 1/2" strip of patterned paper and rough up the top edge. Punch two decorative strips of cardstock and glue them along the long sides: 


Sand the edges of 3 photos (each 3x4" big) and stick them down with tape. I left the top edges open because I want to add some tags later. They don't have to be straight.


Cut 3 tags (3x3" each) from white cardstock and add some photos and stickers to pretty them up a little. I have journalling on the other side as well.


Push them under the main photos. This is a great way to add related photos that aren't masterpieces of photography or don't match the colour scheme of your page!


If you are lucky enough to own a rosette die, cut out a 12" strip. It's  so handy because you get all the scoring done in one quick step. You will notice that my strip is longer than my die. That's because I cut 2 and glued them together.


But don't despair if you don't have a die (get one!): You can punch a scallop or zig-zag edge (or use edge scissors) and fold along the design. The strip should be 1 1/2 x 12" long.
Fold it like a concertina and glue the ends together to form a ring:


Also cut out a circle from some scrap cardstock (you won't see it). Spread strong glue all over the circle and press the ring down (pretty edge on the outside), so it sits flat. Hold it for a little while (I put something on top for 2 min)


Decorate the front with a flower sticker:


Glue a snowman and a snowflake charm on an eye pin to make some cute charm sticks with a twine bow:


I bit of foam tape and plenty of glue holds them all in place:


Now put it all together on the page, put a rhinestone on each splatter, add a title and a little bird charm with a twine bow:


And the page is done!


Tuesday, June 12, 2012

Gorgeousity

Honestly, I did not make this word up! But I had it as a rub on and it fits, so now I'm stuck with it as a title.
We're doing this page in class next week.


photo by Ulrike Schmitt-Hartmann

I got the inspiration for the torn paper with cogs from Julie Winks' page in Scrapbooking Memories (issue 14.8 page 68). It actually ended up looking nothing like hers, but I liked the combination of cogs and flowers. 


We'll be making this little flower from scratch and you can colour yours any colour you want!


We'll make the mini frame too:


Class times are: Tue 10am and Thu 6pm. Sorry, no Friday classes till after the school holidays!

Psst: While you're looking at the mag, check out my technique on page 22! It's all about how to make these felt flowers:


Cheers!


Wednesday, June 6, 2012

A long walk

Wineglass Bay in Tasmania is one of the most beautiful spots on Earth, BUT it's hard to get to. Basically, it's a 2 hour trek up the mountain and down again, only to be repeated on the way back. Still, it was totally worth it. Here is a page of Greg and the kids at the halfway mark.
Next week's class is sweet and simple, but there are still several nice techniques.


We'll do some texture pasting:


Make some rolled thingies:


and a tulle flower:


Sounds good? Why not come along. You can find all the class info in the top right corner on this page.
Cheerio!

Sunday, June 3, 2012

Create an album with me pt2 - Sunflower field

Welcome to my 2nd page for the album project. 
If you have missed the step-by -step instructions for the title page, you can find it here.


If I see a sunflower field, I immediately think of Russia. I had these gorgeous photos of us in a large field taken in 97. 
So here is my sunflower page, which you are welcome to copy. You can use other colours of course, they don't have to be sunflowers. Follow the links to find the products I used.


I am basing most of my album pages on a white background. First of all, it creates a little continuity despite the many colours and it stretches my Echo Park kit so much further. To avoid the background feeling empty, create some glimmer mist splashes like this: Unscrew the nozzle and shake it all over the cardstock. It's random and fun.


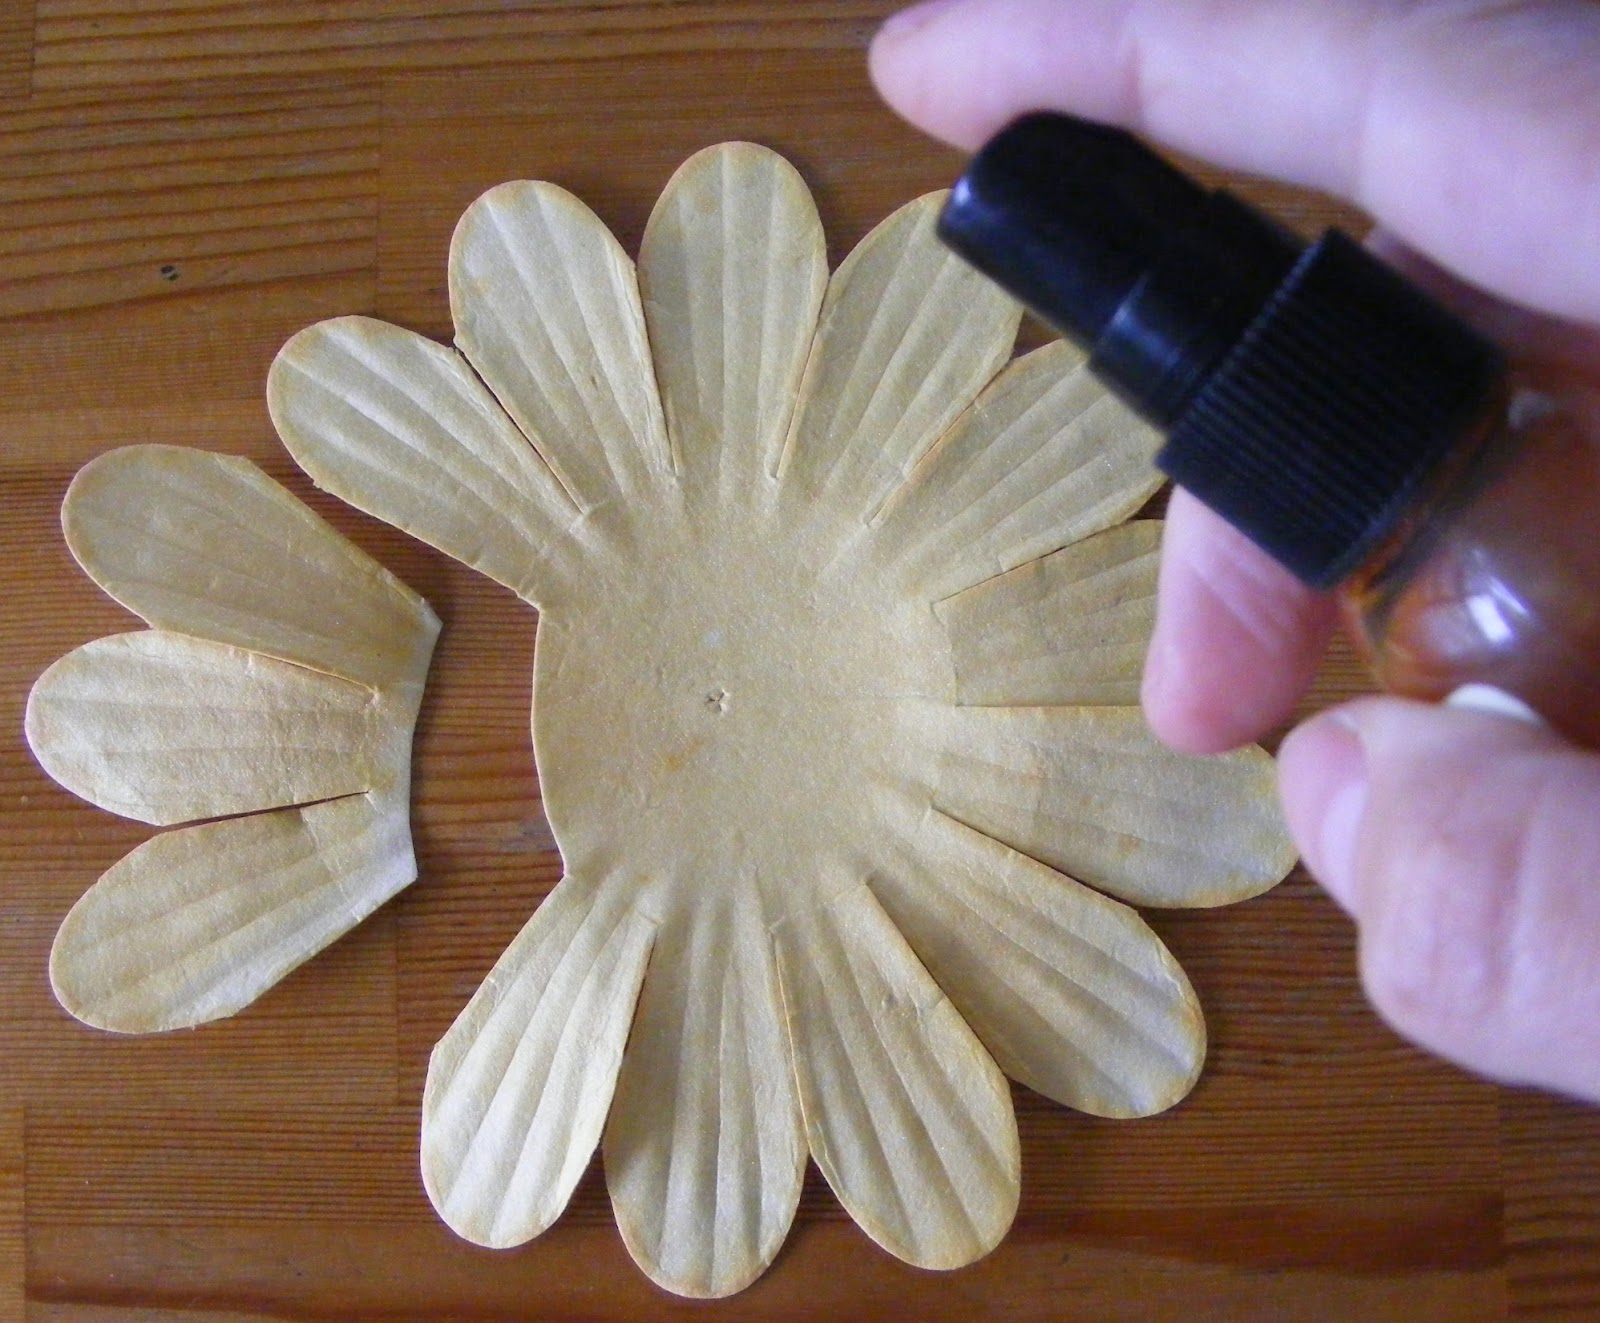
While you got the glimmer mist out, spray a large mulberry flower. 
These flowers are white and huge, perfect for misting. The best part is that they are very strong and won't tear or loose their shape when they get sprayed.
(I cut off 3 of the petals, because I had planned to use them as leaves on the page, but that didn't happen, so I will keep them for later.) 


Punch 4 small holes in each petal and sew a little cross with baker's twine on each one.


Choose a patterned paper and cut off 4 1/2". Gently fold it in half (don't crease it) and draw a curvy line on the back. Cut it out so it looks something like this:


Distress the curved edge and glue these things onto your background: the curvy paper, the main photo with the flower tucked under and over and a round photo (3 1/4" diameter) added to the middle of the flower:


Paint a thin outline around the round photo with liquid glue and glue some twine around it:


(Yup, that's me and Greg when we were young & beautiful)
***
Do you have any Martha Steward deep edge punches? They are (obviously) great for edges, but you can make pretty flowers and lace strips with them too. The principal is the same with any punch you have, but looks best with the wider designs. I will demonstrate on a short strip of paper, you will need a 12" length.

First, measure from the edge (where the edge of the paper sits when punching) to the end of the design. In my case, 1 1/4". Double that and cut your paper strip to the width. 2 1/2" in my case. 


Line up the paper with the end of the punch, like this: 


Punch the whole strip, as if it were a border. Then turn the strip over and start at the other end of the punch:


 Punch the whole length of the strip and you will end up with a strip of flowers:


Easy. Try some other designs, they all look fab.
***
To make the flowers look like sunflowers, take some large brads, cover the tops in Dimensional Magic and dip them into Microbeads:


 I don't have brown microbeads, so I let them dry and painted them brown. Now glue a paper flower under each punched flower to fill out the design and attach the strip to the background with the microbeaded brads:


Use a fence sticker from the kit, too. 
Now embellish the left corner with a yellow flower, a yellow gardenia, a frangipani and star shaped flower (both inked yellow). Add some mini leaves and large white leaves (glimmer misted in green). Last pop on a little daisy charm and a yellow make a wish tile and you're done!


As you can see, having heaps of white flowers and leaves comes in handy because you can mist or ink them in the shade you need. 
For any of the embellishments I used, pop over to my2angels, the friendliest stop for embellishments I know!
***
Cheers!