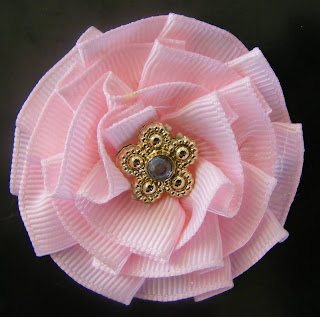
Here is a great way of making ribbon rosettes from a tutorial I did for my2angels. Everything I used can be bought there, too.
Take 1m of grosgrain ribbon, 12 - 20mm wide, and gather it in loops with your sewing machine. I simply fold the ribbon as I go. Sew only along the edge of the ribbon. The smaller the loops the better it will look.
Your ribbon is now only about 1/3 of the original length.
Cut a circle (about 4cm diameter) from sturdy cardstock. This does not have to be perfect as it won’t be seen. For the next step I have used a hot glue gun (cause I’m the impatient kind). You can also use Pritt Glue and hold down each section for a little while till it sticks. Starting from the outer edge, glue on sections of the gathered ribbon until you’ve come all the way around. Then you start overlapping the previous row. Like a snail. You get it.
When you come to the middle leave a small empty space
Now you glue in a Cabochons Flower or an Acrylic Flower, daisy charm or a flower from flower chain. Whatever takes your fancy.
This looks great on a hair pin or a head band too!
Are you a sewing impaired person? Don’t despair, here’s a cheater’s way (though it’s not as sturdy). Stick some 6mm double sided sticky tape along one edge of the ribbon and peel it off one bit at the time as you stick it on the cardboard circle. Pinch it into loops as you go. I used about 1/2m of ribbon.
Finish the centre however you like and you’re done in a flash. This is also great for ribbon that won’t sew easy, like the glitter ribbon I used.
If you have mastered the art of pinching and sewing you can do all sorts of cool stuff, even sewing in the middle of the ribbon and using it as a groovy border. Big loops will look good for boys, too.
Geli


No comments:
Post a Comment